A Sound Check Should Prove the Show, Not Just the Speakers
By Broadwaytrax Content Studio · August 10, 2026
A musical-theater backing-track sound check should prove that the exact performance files work through the exact system the audience will hear.
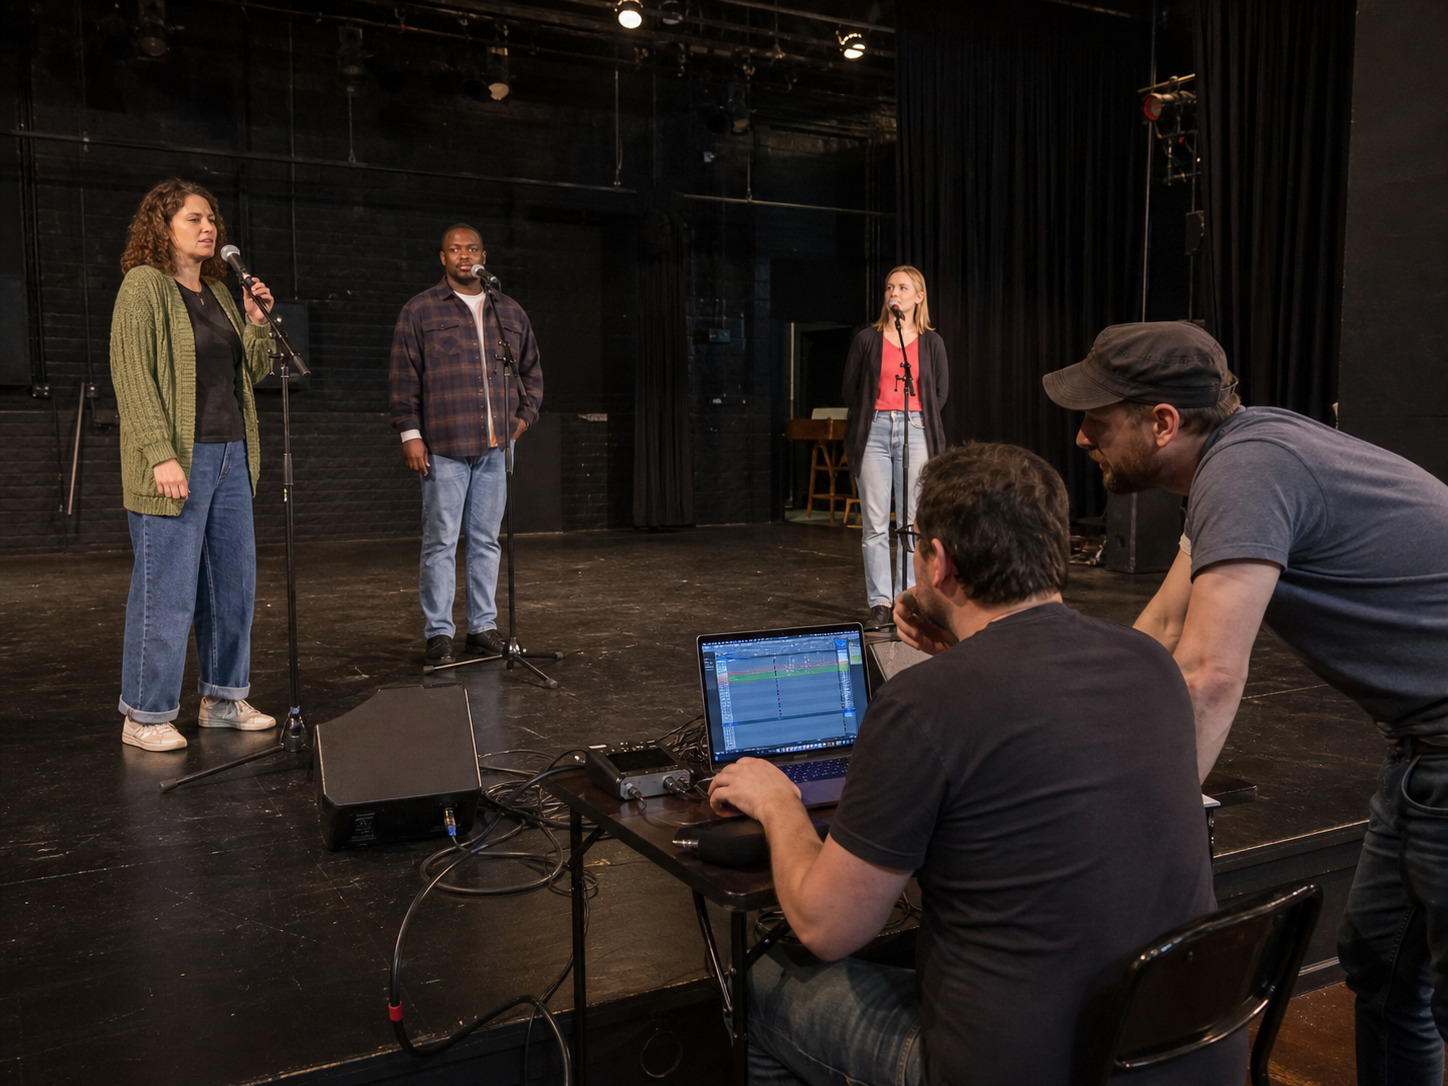
That means more than pressing play and asking whether the track is loud enough. The team needs to test entrances, vocal clarity, monitor coverage, scene-change noise, cue timing, endings, backups, and the handoff between the stage manager and playback operator.
The most useful sound check follows the show from file to room: approved track, playback device, audio connection, mixer, speakers, monitors, microphones, performers, and audience area.
What should a musical-theater backing-track sound check test?
Test five things for every important number:
- The correct file starts from the correct cue.
- Performers can hear enough music to enter and stay together.
- The audience can understand lyrics over the accompaniment.
- The ending, fade, vamp, or stop behaves as rehearsed.
- A tested backup can take over without inventing a new workflow.
If any one of those fails, turning up the master volume is rarely the whole solution.
Bring only approved show files into the room
Sound check is not the time to decide which export is current.
Build one active playback folder before the theater call. Include:
- the approved performance track for every number;
- any approved preshow, scene-change, underscore, dance-break, or curtain-call files;
- the exact key, cut, tempo, lead-in, vamp, and ending used in rehearsal;
- a guide-vocal file only when the check specifically needs it;
- a cue sheet that matches the filenames;
- and an identical backup copy on a second tested device.
Move superseded exports out of the active folder. Names such as final, new final, and use this one do not protect a live show. Use a stable number and description that the cue sheet can repeat, such as S12_Act1_Finale_Performance.
If the rehearsal room exposed a key, cut, cue, or ending problem, resolve it before loading the theater system. (Broadwaytrax custom tracks) can be prepared around production-specific keys, cuts, tempos, cues, lead-ins, vamps, and endings.
Check the complete signal path
A track can sound fine on a laptop and fail after it passes through the theater system.
Trace the whole path:
| Point in the path | What to confirm |
|---|---|
| Playback device | Correct file, offline access, notifications silenced, power connected |
| Audio output | Secure cable or interface, no loose adapter, no unexpected mono collapse |
| Mixer input | Clear channel label, healthy level, no clipping, correct mute state |
| Main speakers | Even audience coverage, no harsh or missing frequency range |
| Stage monitors | Performers hear the pulse and entrances without fighting the room |
| Vocal microphones | Lyrics stay intelligible over the densest tested section |
| Backup path | Second device and connection can reproduce the approved show files |
Listen for hum, buzz, distortion, delayed playback, sudden level changes, and a left-or-right part of the arrangement disappearing. Fix the cause at the correct point instead of covering every problem with more volume.
Start with speech, then build the mix
The audience needs to understand the story.
Begin with one performer speaking in the quietest voice the production expects. Set a clear vocal reference. Then test sung material over the accompaniment, beginning with a moderate section before moving to the largest ensemble or orchestration.
The goal is not to make the track feel impressive by itself. The goal is to keep words, rhythm, harmony, and theatrical energy working together.
Listen from several positions:
- front center;
- front side;
- middle center;
- rear seating;
- beneath a balcony when applicable;
- and any known coverage problem in the venue.
Do not judge the room only from the sound position. The operator may hear a balanced mix while a performer hears no pulse and the front row hears mostly speakers.
Give performers enough track without flooding the stage
Performers need usable musical information: pulse, first pitch or pickup, tempo, important orchestration landmarks, and the ending.
Ask specific questions. “Can you hear it?” often produces a polite yes. Better questions include:
- Can you hear the count-in before your first word?
- Which instrument helps you find the entrance?
- Can you stay with the dance break from this position?
- Does the chorus cover the next spoken cue?
- Can you hear the final button while facing upstage?
Test the actual staging. A singer who hears well at center may lose the track behind scenery, near a loud effect, or while moving into the wings.
Increase monitor level only as much as needed. More stage volume can return through open microphones and make the audience mix harder to control.
Test the densest and quietest moments
Running one verse from one song does not prove the show.
Choose a small set of diagnostic sections:
- the quietest spoken-to-sung entrance;
- the largest ensemble or dance section;
- a number with exposed lyrics;
- a section with strong bass or percussion;
- a cue that begins under applause or scene-change noise;
- a vamp, hold, repeat, or called exit;
- and an ending that must land with action or light.
These moments reveal different problems. The quiet entrance tests noise and clarity. The largest section tests headroom. The cue under applause tests communication and timing. The vamp tests whether the stage manager and operator share the same exit language.
Run every cue from its real trigger
Do not test a song only by opening the file and clicking play.
Begin with the line, movement, light cue, or called GO that starts it. The stage manager should call the production cue; the operator should start the approved file; the performer should hear and execute the real entrance.
For each cue, confirm:
- exact trigger;
- first audible event in the file;
- first sung, danced, or spoken entrance;
- expected level at the start;
- any live level change;
- vamp or hold behavior;
- ending behavior;
- and the next cue or line.
This is also the moment to catch an over-trimmed lead-in. If the operator and performer need an impossible reaction time, the production may need a clearer cue or an adjusted file—not faster fingers.
Make scene changes part of the check
Scenery, costumes, audience noise, applause, and backstage traffic change what people can hear.
Run at least one track start during an actual scene change. Move the practical scenery involved. Use the crew positions and communication system planned for performance. Ask whether the performers still hear the pickup and whether the audience mix remains clear over the movement.
If a track plays under dialogue, test the real speaker, microphone, blocking, and level change. Write the adjustment as an operator cue instead of relying on memory.
Record changes with one owner and one deadline
Sound-check notes should identify what changes, who owns it, and how it will be verified.
| Weak note | Useful note |
|---|---|
| Track too loud | Reduce S08 playback 3 dB under the first four dialogue lines; sound operator verifies from rear center |
| Singer cannot hear | Add S14 to the stage-left monitor check; performer verifies first entrance from the platform |
| Wrong ending | Replace S19 with the approved button ending; music director and operator verify duration and cutoff |
| Cue felt late | Call S05 on the actor's final consonant; stage manager, operator, and actor rerun the handoff |
Do not make an untracked file change on the playback device. A revised track should return through the same approval, naming, backup, and cue-sheet process as any other production file.
Use a two-pass sound-check plan
Pass 1: system and room
Check the signal path, speaker coverage, vocal reference, stage monitors, quiet section, dense section, and backup connection. Solve system-level problems before testing many cues.
Pass 2: show handoffs
Run the production's most fragile starts, stops, vamps, dialogue underscoring, scene changes, and endings in cue order. Record each change and repeat the exact moment after the repair.
This separation keeps the company from waiting while the team discovers a cable or routing problem, and it keeps a healthy system from being blamed for a bad cue or wrong file.
Backing-track sound-check checklist
- Load only approved performance files.
- Match filenames to the current cue sheet.
- Confirm offline playback and power.
- Test the full device-to-speaker signal path.
- Establish speech and lyric clarity before chasing track volume.
- Listen from several audience positions.
- Test stage monitors from the actual blocking.
- Run the quietest and densest sections.
- Test real triggers, vamps, stops, fades, and endings.
- Include scene-change and applause conditions.
- Verify the backup device and connection.
- Assign every repair to an owner and rerun the exact moment.
FAQ: musical-theater backing-track sound checks
How long should a backing-track sound check take?
It depends on the venue, system, cast, and show, but a focused call should prioritize the complete signal path and a small set of diagnostic moments before running many songs. A written plan prevents the call from becoming an unfocused rehearsal.
Should the full cast attend?
Use the performers and crew needed to test the production's quietest, largest, and most complicated musical handoffs. The full company may not be necessary for every system check, but ensemble balance cannot be proved without a representative group.
Should guide vocals be used during sound check?
Only for a specific diagnostic need. Performance sound check should use the accompaniment files the audience will hear. Guide vocals can help confirm a learning reference, but they should not hide whether performers can enter and stay together without the teaching voice.
What is the most important backup?
A second tested playback device with the same approved files, cue order, and usable connection to the system. A backup that has never been connected in the venue is only a stored copy, not a tested recovery path.
What if the track is clear but the lyrics are not?
Return to the vocal reference, microphone technique, accompaniment level, monitor spill, and room coverage. Test the exposed lyric and densest section from the audience area before deciding which part of the mix should change.
The takeaway
Resolve the key, cut, tempo, cue, lead-in, vamp, or ending before the production loads the theater. Build a performance-ready track around the handoffs your team needs to test.
Plan a Performance-Ready TrackA useful sound check proves the show, not just the speakers.
Bring one approved file set, trace the full signal path, protect lyric clarity, test the performers' real positions, run the fragile handoffs, and verify the backup. When the audience arrives, the production should already know how every important track enters the room and leaves it.